How to Cook Chicken Breast on Blackstone Griddle Step-by-Step
Table of Contents
Do you remember those evenings when dinner felt like a chore, a frantic dash to get something, anything, on the table? For me, there was a time when cooking chicken breast was the bane of my existence. Dry, rubbery, or inconsistently cooked – it felt like an insurmountable challenge. But then, your Blackstone griddle entered your life, and everything changed. Suddenly, that versatile piece of equipment transformed mundane meals into culinary adventures, and cooking chicken breast became not just easy, but genuinely enjoyable. This guide isn’t just about throwing chicken on a griddle; it’s about unlocking a level of flavor and tenderness you never thought possible, turning weeknight dinners into restaurant-quality experiences, and reclaiming the joy of cooking. Get ready to ditch the dry chicken and embrace a world of juicy, perfectly seared perfection, all thanks to your trusty Blackstone.
Why Your Blackstone Griddle is a Game-Changer for Chicken Breast
You might be accustomed to preparing chicken breast in a skillet or on a traditional grill, but once you experience the capabilities of a Blackstone griddle, you’ll discover a distinct advantage. Your griddle, often crafted from robust rolled steel, offers a cooking surface unlike any other. This material is paramount to its performance. It heats up uniformly across its expansive surface, eliminating those frustrating hot and cold spots you might encounter with other cooking apparatuses. This even heat distribution means your chicken breast on Blackstone will cook consistently from edge to edge, reducing the risk of one part being done while another remains undercooked.
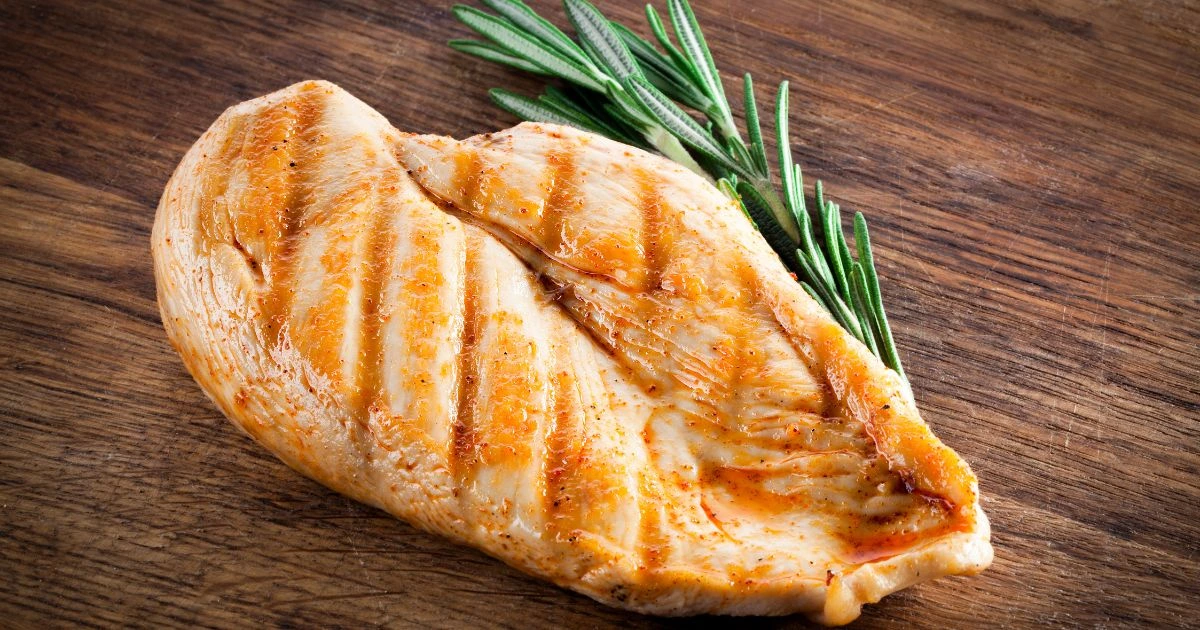
Beyond mere consistency, your griddle excels at developing an unparalleled sear. When your chicken breast makes contact with that intensely hot, flat surface, it undergoes the Maillard reaction with astonishing efficiency. This chemical process is responsible for that delectable golden-brown crust and the rich, savory flavors that make perfectly cooked chicken so appealing. You’ll achieve a crisp exterior that locks in the natural juices, resulting in a remarkably tender interior.
The versatility of your Blackstone also sets it apart. While it excels at searing, you can also use it to sauté vegetables simultaneously, allowing you to prepare an entire meal with minimal fuss. Imagine cooking your seasoned chicken breast alongside vibrant peppers and onions, all on the same surface. This streamlined approach not only makes meal preparation simpler but also significantly eases cleanup compared to juggling multiple pots and pans. You’ll find that a quick scrape and wipe down are often all that’s required to have your griddle ready for its next culinary adventure.
Essential Gear for Griddling Chicken Breast on Blackstone
Before you embark on your journey to perfectly griddled chicken, ensuring you have the right tools at hand will make the process smooth and enjoyable. You don’t need a professional kitchen setup, but a few key items will elevate your experience and ensure safety and success when cooking chicken breast on your Blackstone.
First and foremost, of course, is your Blackstone griddle. Whether you own a portable tabletop model or a larger backyard station, understanding its specific heat zones and surface area will be beneficial.
Next, a pair of reliable spatulas is indispensable. You’ll want a sturdy, flat spatula for flipping your chicken and perhaps a thinner turner for scraping and maneuvering. Look for ones with comfortable handles that can withstand high temperatures.
When it comes to oil, always opt for a high smoke point oil. Avocado oil, grapeseed oil, and refined olive oil are excellent choices. These oils can withstand the high temperatures of your griddle without breaking down and imparting off-flavors to your food. You’ll use this to coat your griddle surface, creating a non-stick layer and aiding in that beautiful sear.
Perhaps the most crucial tool for ensuring food safety and perfectly cooked chicken is a meat thermometer. Relying solely on visual cues can lead to undercooked or overcooked chicken. An instant-read thermometer will give you an accurate internal temperature, ensuring your chicken reaches the safe consumption point of 165°F (74°C) without becoming dry.
Tongs are also highly useful for handling chicken, especially if you need to adjust its position without disturbing the seared crust. Finally, keep a roll of paper towels nearby for cleaning your griddle during and after cooking. And for that essential resting phase, aluminum foil or a griddle dome will be beneficial.
Preparing Your Chicken Breast for Blackstone Perfection
The secret to truly outstanding chicken breast on Blackstone begins long before it touches the hot surface. Proper preparation is paramount to achieving that ideal tenderness and even cooking.
Choosing the Best Chicken Breast
When selecting your chicken breast, aim for boneless, skinless cuts. While bone-in, skin-on versions have their place, for griddling, the boneless, skinless variety offers the most straightforward and consistent results. Pay attention to the thickness of the individual breasts. You’ll want pieces that are as uniformly thick as possible. If some are significantly thicker than others, they will cook at different rates, potentially leading to some parts being dry while others are still cooking.
Pounding for Evenness
This step is a game-changer for uniform cooking. Even if you start with relatively consistent pieces, a quick pound will ensure truly even thickness. Why is this important? Because a chicken breast that’s thicker on one end and thinner on the other will inevitably result in the thinner end drying out by the time the thicker part is cooked through. To pound your chicken, place a breast between two sheets of plastic wrap or in a large zip-top bag. Use a meat mallet, a rolling pin, or even the bottom of a heavy skillet to gently pound the chicken until it reaches your desired, consistent thickness – typically about 1/2 to 3/4 inch. This also helps to tenderize the meat, making for a more pleasant eating experience.
The Art of Seasoning Chicken Breast for the Blackstone
Seasoning isn’t just about flavor; it’s about enhancing the overall culinary experience. At a minimum, always use salt and freshly ground black pepper. These two staples alone will dramatically improve the taste. Beyond that, the world of spices is your oyster. Consider a blend of paprika, garlic powder, onion powder, dried oregano, and a touch of thyme for a robust, all-purpose flavor that complements chicken beautifully.
You can opt for a simple dry rub, applied liberally to both sides of your pounded chicken. Alternatively, if you have more time, a marinade can infuse your chicken with even deeper flavors and help tenderize it further. Citrus-based marinades (lemon, lime), yogurt-based marinades (for tenderness), or oil-based marinades with herbs and spices are all excellent choices. Remember, for food safety, any marinade that has touched raw chicken should not be used as a sauce unless it’s boiled thoroughly.
Here’s a basic, yet incredibly effective, seasoning blend you can use for your chicken breast on Blackstone:
Table: Basic Chicken Breast Seasoning Blend
| Ingredient | Quantity (for 1 lb chicken) | Notes |
| Salt | 1 tsp | Adjust to taste |
| Black Pepper | 1/2 tsp | Freshly ground preferred |
| Garlic Powder | 1 tsp | Essential flavor |
| Onion Powder | 1/2 tsp | Adds depth |
| Paprika | 1 tsp | For color and mild flavor |
| Dried Oregano | 1/2 tsp | Classic herb |
Combine these ingredients and rub them generously onto all surfaces of your chicken breasts. For best results, allow the seasoned chicken to sit at room temperature for 15-20 minutes before cooking, or refrigerate for at least 30 minutes (or up to a few hours) to let the flavors meld.
Step-by-Step Guide: How to Cook Chicken Breast on a Blackstone Griddle
Now, for the main event! Follow these steps closely, and you’ll achieve perfectly cooked chicken breast on your Blackstone every time.
Step 1: Preheating Your Blackstone Griddle
Proper preheating is critical for that enviable sear and even cooking. Turn your griddle to medium-high heat. Allow it to preheat for at least 10-15 minutes. You’ll know it’s adequately hot when you can sprinkle a few drops of water on the surface and they immediately sizzle and evaporate. Consistency in heat across the griddle surface is key, so give it ample time to come up to temperature.
Step 2: Oiling the Griddle Surface
Once your griddle is hot, apply a thin, even layer of your chosen high smoke point oil. You can pour a small amount directly onto the surface and then use a paper towel held with tongs to spread it evenly, or use a dedicated griddle oil dispenser. You want just enough to create a glistening surface, not a pool of oil. This oil layer prevents sticking and contributes to that beautiful golden crust.
Step 3: Laying Down the Chicken Breast
Carefully place your seasoned chicken breasts onto the hot, oiled griddle. Lay them down one by one, ensuring they are in a single layer and not overcrowded. Overcrowding will lower the griddle’s surface temperature, leading to steaming rather than searing, and your chicken will lack that desirable crust. Listen for that immediate, satisfying sizzle – it’s the sound of success!
Step 4: The First Sear
Resist the urge to move your chicken around immediately. Let it cook undisturbed for 5 to 7 minutes on the first side. The exact time will depend on the thickness of your chicken and the heat of your griddle. During this time, the magic of the Maillard reaction is taking place, creating that rich, flavorful crust. You’ll know it’s ready to flip when you can easily slide your spatula underneath without the chicken sticking, and you see a beautiful, golden-brown crust.
Step 5: Flipping and Finishing
Using your spatula, carefully flip each chicken breast to the second side. Again, let it cook without disturbance. The cooking time for the second side will typically be similar to the first, though it might be slightly shorter. This is where your meat thermometer becomes your best friend. Insert it into the thickest part of the chicken breast, avoiding any bones (if present) or going straight through to the griddle. You are aiming for an internal temperature of 165°F (74°C). Once it reaches this temperature, your chicken is safely cooked and ready to be removed from the heat.
Step 6: Resting for Juiciness
This step is absolutely crucial and often overlooked. Once your chicken breasts reach 165°F (74°C), immediately remove them from the griddle and place them on a cutting board or plate. Tent them loosely with aluminum foil or place them under a griddle dome. Allow them to rest for 5 to 10 minutes. This resting period allows the juices within the meat, which have been pushed to the center during cooking, to redistribute evenly throughout the chicken. Skipping this step will result in juices flowing out when you cut into the chicken, leaving you with a drier product. The internal temperature will also continue to rise slightly during this rest, a phenomenon known as carryover cooking.
Troubleshooting Common Blackstone Chicken Breast Issues
Even with the best intentions, you might encounter a snag or two. Knowing how to troubleshoot these common issues will help you refine your technique for cooking chicken breast on Blackstone.
Chicken is Dry and Tough
This is perhaps the most common complaint when cooking chicken breast. If your chicken comes out dry and tough, it’s almost certainly overcooked. Remember, chicken breast is lean and cooks quickly. Use your meat thermometer to ensure you pull it off the heat precisely at 165°F (74°C). Another contributing factor could be not resting the chicken after cooking. As discussed, resting allows juices to redistribute, leading to a much more tender result. Lastly, if your chicken breasts were too thin to begin with, they will cook very rapidly and can become dry before you even realize it. Pounding them to an even, slightly thicker (around 3/4 inch) consistency helps retain moisture.
Chicken Isn’t Searing Properly
If you’re not getting that beautiful golden-brown crust, several factors could be at play. Most often, the griddle wasn’t hot enough when you placed the chicken on it. Ensure you preheat your Blackstone to medium-high heat for a full 10-15 minutes before adding any oil or food. Another culprit can be too much oil on the griddle; a thin, even layer is all that’s required. Lastly, overcrowding the griddle will drastically drop the surface temperature, leading to steaming instead of searing. Cook your chicken in batches if necessary, ensuring each piece has ample space.
Unevenly Cooked Chicken
If some parts of your chicken are cooked perfectly while others are underdone or overcooked, it usually points to one of two things. First, the chicken breast itself might be unevenly thick. This is where the pounding step becomes invaluable. Second, your griddle’s heat might be inconsistent. While Blackstones generally offer excellent heat distribution, ensure your burners are clean and functioning properly. Some griddles have hotter and cooler zones; learning your specific griddle’s characteristics can help you place your chicken accordingly.
Delicious Variations and Serving Suggestions
Once you’ve mastered the basic technique for chicken breast on your Blackstone, the possibilities for flavor variations and delicious pairings are virtually limitless.
Blackstone Chicken Breast Recipes
Experiment with different flavor profiles to keep your meals exciting:
- Lemon Herb Chicken Breast: Before griddling, season your pounded chicken with salt, pepper, garlic powder, dried oregano, and dried thyme. A few minutes before it’s done, squeeze fresh lemon juice over the chicken for a bright, zesty finish.
- Spicy Cajun Chicken Breast: Rub your chicken generously with a pre-made Cajun seasoning blend or create your own with paprika, cayenne pepper, onion powder, garlic powder, and a touch of dried oregano.
- Honey Garlic Chicken Breast: Whisk together honey, soy sauce, minced garlic, and a splash of rice vinegar. Brush this glaze onto your chicken during the last few minutes of cooking, allowing it to caramelize slightly.
- Chicken Fajita Strips: Slice your chicken breast into strips before cooking. Season with fajita seasoning and griddle alongside sliced bell peppers and onions.
Perfect Pairings for Your Chicken Breast on Blackstone
Your perfectly cooked chicken breast can be the star of countless meals:
- Griddled Vegetables: Capitalize on your Blackstone’s versatility by cooking sliced bell peppers, onions, zucchini, or asparagus right alongside your chicken. A simple drizzle of oil and a sprinkle of salt and pepper are all they need.
- Rice or Quinoa: A simple bed of fluffy rice or nutritious quinoa provides an excellent base to absorb the chicken’s juices and any accompanying sauces.
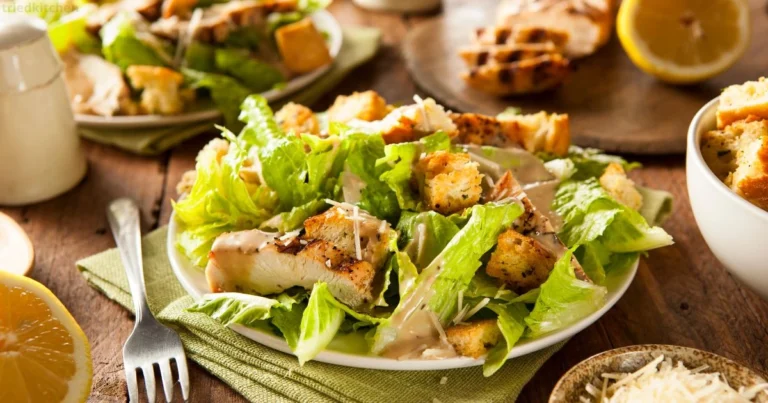
- Salads: Slice your griddled chicken breast and serve it warm or chilled over a fresh mixed green salad with your favorite dressing for a light and healthy meal.
- Pasta: Dice your cooked chicken and toss it with your favorite pasta, a creamy Alfredo sauce, or a fresh pesto for a satisfying dish.
- Sandwiches/Wraps: Slice your chicken thinly for epic sandwiches or wraps, adding your preferred condiments and fresh vegetables.
Cleaning and Maintaining Your Blackstone Griddle After Cooking Chicken Breast
Proper care of your Blackstone griddle ensures its longevity and continued non-stick performance.
- Scrape Off Food Debris While Warm: While your griddle is still warm (but not scorching hot), use your griddle scraper to push any leftover food bits and excess oil into the grease trap. This is much easier to do while the griddle is still warm.
- Wipe Down with Paper Towels: Once scraped, use a few layers of paper towels to wipe the griddle surface clean. For stubborn spots, a little water can be added to create steam, which helps lift stuck-on food. Be careful of the steam.
- Apply a Thin Layer of Cooking Oil for Seasoning: After cleaning, it’s crucial to apply a very thin layer of high smoke point cooking oil (like flaxseed oil, grapeseed oil, or Blackstone’s griddle seasoning oil) to the entire cooking surface. This re-seasons the griddle, prevents rust, and maintains its non-stick properties. Rub it in thoroughly and wipe off any excess.
- Proper Storage: If your griddle is exposed to the elements, invest in a good quality griddle cover to protect it from moisture and debris.
FAQ: Cooking Chicken Breast on a Blackstone Griddle
How long does it take to cook chicken breast on a Blackstone?
Typically, cooking chicken breast on a Blackstone takes about 10-14 minutes total. This duration can fluctuate based on the thickness of your chicken breasts and the precise temperature of your griddle. For ultimate assurance, always verify with an instant-read meat thermometer.
What temperature should my Blackstone be for chicken breast?
You should aim for your Blackstone griddle to be at a medium-high heat, roughly in the range of 375-400°F (190-204°C). This temperature range is ideal for achieving a beautiful sear while ensuring the chicken cooks through evenly without burning.
Do I need to oil the chicken breast or the griddle?
For optimal results when cooking chicken breast on your Blackstone, it is generally best to oil the griddle surface itself. Applying a thin, even layer of high smoke point oil directly to the hot griddle ensures uniform coverage, helps prevent sticking, and contributes to a consistent, golden-brown crust. While you can lightly oil the chicken too, oiling the griddle provides better control over the cooking environment.
Can I cook frozen chicken breast on a Blackstone?
It is not recommended to cook frozen chicken breast on your Blackstone griddle. Cooking chicken from a frozen state can lead to uneven cooking, where the exterior burns before the interior is safely cooked through. This also poses potential food safety risks. For best results and to ensure thorough cooking, always thaw your chicken breast completely before placing it on the griddle.
How do I know if my chicken breast on the Blackstone is done?
The most accurate and reliable method to determine if your chicken breast on the Blackstone is done is by using an instant-read meat thermometer. Insert the thermometer into the thickest part of the chicken breast, making sure it doesn’t touch the griddle surface. The internal temperature should register 165°F (74°C). Visual cues, such as the color of the juices or cutting into the chicken, are less reliable and can lead to overcooked or undercooked results.
Conclusion: Master Your Blackstone, Master Your Meals
Cooking chicken breast on a Blackstone griddle is more than just a technique; it’s a revelation. Gone are the days of dry, uninspired chicken. With the simple steps and tips outlined in this guide, you now possess the knowledge to consistently create tender, juicy, and flavorful chicken breasts that will impress even the most discerning palates. So fire up your Blackstone, embrace the sizzle, and transform your weeknight dinners into delicious, memorable experiences. You’re now equipped to elevate your culinary game and enjoy the truly remarkable flavors your griddle can deliver. Happy griddling!
Ready to elevate your everyday meals? Share your favorite Blackstone chicken breast recipes and tips in the comments below, or snap a picture of your perfectly griddled creation and tag us on social media!

